The first thing you notice is the dust. Not the dramatic, cobweb kind that belongs in haunted houses, but the quiet, velvety film that settles over time—the kind that softens edges and steals the light from polished wood. Maybe it’s the dining table that has held decades of meals and arguments, or the oak sideboard you rescued from your grandmother’s house. Under that faint gray veil, and beneath the water rings and scuffs, there’s a hidden glow. Restoration experts will tell you: most “ruined” wooden furniture isn’t ruined at all. It’s just waiting for someone with a microfiber cloth, a simple homemade solution, and a little patience to coax it back to life.
The Afternoon Light and the Secret in the Bottle
Picture this: an old chair sits by a window, its once-deep walnut finish dulled to something closer to a tired brown. When the afternoon light slides across the room, it no longer glints off the curves of the arms or the carved back; it simply lands, flat and uninterested, as if the chair has nothing left to say.
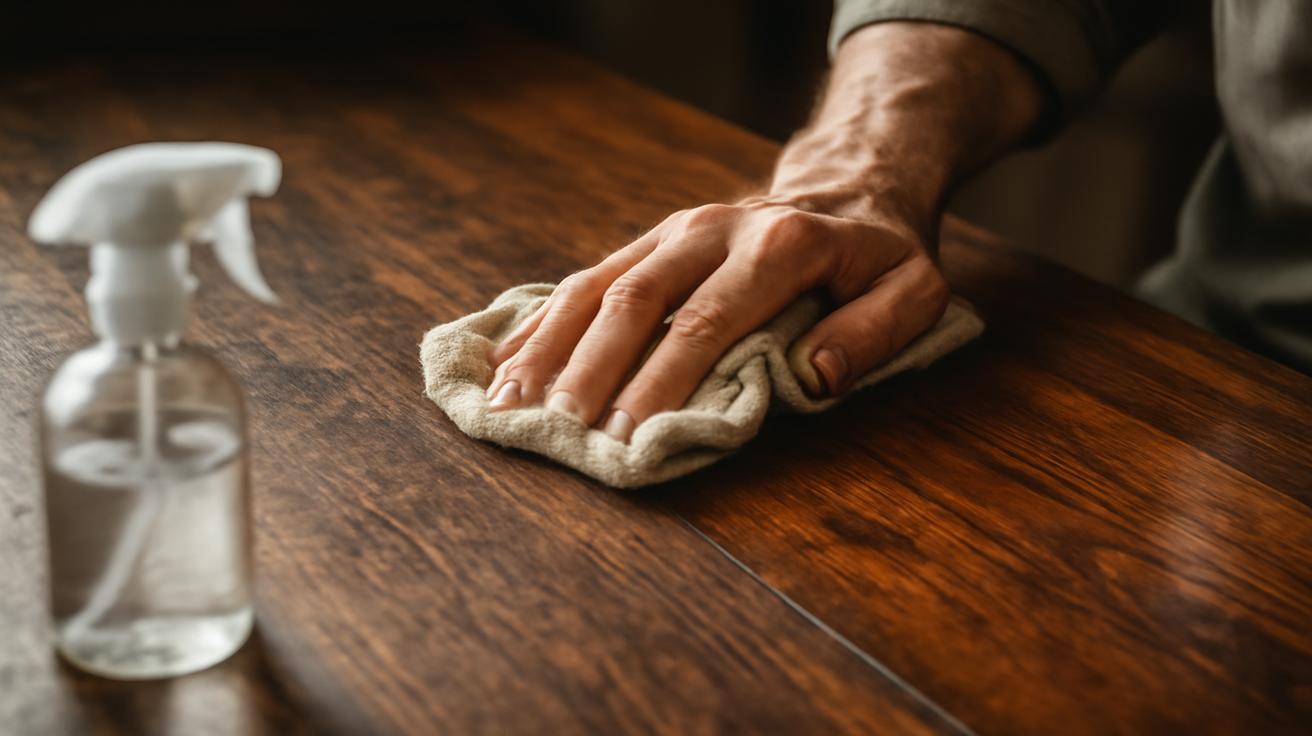
Now imagine dipping a soft microfiber cloth into a small bowl of golden liquid—a mixture that smells faintly of citrus and something warm and familiar, like the inside of an old carpentry shop. You wring the cloth out until it’s only slightly damp, then press it gently against the wood. With a slow, patient swipe, you draw the cloth along the grain.
Almost instantly, the surface shifts. The dullness gives way to a subtle sheen, not glossy and artificial, but like healthy skin after a drink of water. Fine lines in the grain re-emerge. Old scars—those dings and hairline scratches—soften and blur. What was flat becomes dimensional again. It’s not magic; it’s chemistry, care, and a tiny bit of time-travel.
This is the moment restoration experts love. Not the end result, not the final “after” photo, but that first swipe when the wood responds. The secret, they insist, isn’t an expensive commercial product or some obscure restoration compound. It’s a simple homemade solution, the right kind of cloth, and the humility to let the wood tell you how far it wants to go.
The Simple Homemade Solution That Changes Everything
Ask three restoration experts about their favorite furniture solution, and you’ll get three variations on a very similar theme. The core idea is straightforward: clean gently, nourish deeply, and protect lightly—without suffocating the wood under heavy waxes or harsh solvents.
One commonly recommended formula, and the one that most closely resembles what pros mix in their back rooms, follows a basic ratio. It’s simple enough to make in a small jar on your kitchen counter, but subtle enough to coax surprising life out of even neglected pieces. Here’s a practical reference you can glance at on your phone while you stand in front of that dusty dresser:
| Ingredient | Amount | Purpose |
|---|---|---|
| Olive oil (or light mineral oil) | 3 parts | Rehydrates and adds a soft, natural sheen |
| White vinegar | 1 part | Cuts grease, lifts grime, gently cleans finish |
| Optional: a few drops of lemon essential oil | 3–5 drops per cup | Adds light scent and mild degreasing power |
Stir or shake gently to combine before each use; the vinegar and oil naturally separate, just like a salad dressing. The restoration specialists who favor this blend love it because it performs three jobs at once: it loosens the film of everyday life, it feeds thirsty finishes, and it does all of this without stripping or burning the original patina that gives old wood its soul.
The cloth you choose matters just as much. Microfiber isn’t just a trendy cleaning fad; its ultra-fine fibers trap dust and grime instead of pushing them around. That means as you glide across the surface, you’re removing the micro-particles that dull the finish instead of grinding them into the wood like sandpaper.
The Quiet Ritual of Application
There’s a ritualistic quality to restoring wood with this solution, almost like brewing tea or polishing a favorite pair of shoes. You pour a modest amount into a bowl. You fold your microfiber cloth into a soft pad that fits comfortably in your palm. You dip, twist, and squeeze until the cloth is just damp—never dripping.
Experts recommend starting in an inconspicuous spot: the inside of a table leg, the back of a drawer front, the underside of a chair seat. Press the cloth lightly and work with the grain, not across it. Watch what happens. If the finish responds with a mellow glow and no clouding or roughness, you’re on safe ground.
Once you’ve tested, you move on to the visible surfaces. Long, even strokes. Occasional pauses to re-fold the cloth so a clean section faces down. That’s part of the secret too—never let a dirty patch of cloth circle endlessly over the wood. As grime lifts into the microfiber, it should stay there, not redeposit in streaks.
Listening to the Wood’s Story
Old furniture has a way of keeping secrets. Under the dimness and scratches, there’s always a story: the ring of a forgotten teacup, a scuff from a child’s toy, the faint outline of where a lamp used to stand for years. When restorers talk about “respecting the piece,” they don’t speak in vague, romantic terms; they mean paying honest attention to what the surface is showing you.
As your microfiber cloth travels slowly along a tabletop, you begin to see patterns. That grayish haze in the middle? Likely a buildup of silicone-based sprays and everyday dust. The darker streak near the edge? Perhaps an old spill that never fully cleared. The homemade solution chips away at these layers gently, letting the original finish emerge without scrubbing or scraping.
What often surprises people is how quickly the transformation starts, especially on wood that hasn’t been tended in years. With just a few passes, the piece begins to reclaim the warm luster it had when it first entered a home generations ago. The oil threads itself into microscopic fissures in the finish, filling what once looked like dryness or fatigue. The vinegar breaks down the invisible film from kitchen fumes, hand oils, and airborne particles.
Restoration experts caution against rushing this stage. They talk about “listening with your eyes”—letting each new pass inform the next. If an area looks saturated, you stop and move on. If a dull patch remains, you revisit it, but always lightly. The goal isn’t perfection; it’s renewal without erasing history.
When “Almost Brand-New” Is Better Than New
The phrase that so many professionals use—“almost brand-new finish”—carries a quiet caveat. You are not trying to return a 70-year-old dresser to the mirror-bright, factory-hard gloss it had on the showroom floor. Instead, you’re aiming for something more interesting: a finish that feels alive, coherent, and cared for, while still wearing its age with dignity.
Under natural light, a properly refreshed piece doesn’t shout; it glows. The reflections are soft, not glassy. The edges of old dents remain, but no longer dominate the surface. The grain stands out in gentle contrast like topographical lines on a map. This kind of “almost new” has depth. It carries memory.
Many modern nature-oriented design magazines have noticed a shift toward this aesthetic: rooms anchored by pieces that look neither battered nor sterile, but seasoned. The homemade solution and microfiber method is a quiet rebellion against throwaway culture. Instead of replacing a table because its finish has dulled, you sit down with it for an afternoon, cloth in hand, and choose restoration over replacement.
The Step-by-Step Dance of Restoration
By now, the process might feel almost intuitive, but it helps to think of it as a small, ordered dance—a comfortable routine you can repeat any time another forgotten piece arrives in your life.
1. Dust, Don’t Drench
Begin dry. Take a clean, dry microfiber cloth and sweep away loose dust, cobwebs, and debris. Work gently over carvings, corners, and moldings. This is your first act of respect: you’re clearing the stage before inviting moisture to the scene. Skipping this step and jumping straight to the solution means grinding grit into the finish—something no expert would risk.
2. Mix the Solution in Small Batches
In a small bowl or jar, combine three parts olive or mineral oil with one part white vinegar. Add a few drops of lemon essential oil if you like the scent and mild cleaning boost. Make only as much as you’ll use in one session. This mixture is best fresh, and the ingredients are inexpensive enough that there’s no need for giant batches.
3. Work in Sections
Dip your microfiber cloth lightly into the mixture and squeeze it out thoroughly. Choose a manageable area—a quarter of a tabletop, one drawer front, a chair back. Apply in smooth, overlapping strokes along the grain. Let the cloth do the work; you’re not scrubbing a pan; you’re coaxing finish back to life.
4. Wipe Away the Excess
After a minute or two, follow up with a second, clean, dry microfiber cloth. This step is crucial. Any unabsorbed oil left pooling on the surface can become tacky or attract dust. You want the wood to look quietly nourished, not slick or wet. If your hand glides comfortably without leaving prints, you’ve hit the sweet spot.
5. Let the Piece Breathe
When you’ve finished all sections, give the furniture time. A few hours, or ideally overnight, lets the finish settle. In the morning, you may find that the sheen has evened out and deepened. If certain areas still look dry, you can repeat a light application there, always remembering that subtle layers are better than one heavy dose.
What Experts Wish Everyone Knew About Old Wood
There’s a quiet frustration you’ll hear if you spend time with furniture restorers: the number of pieces lost not to time, but to impatience. Harsh chemical strippers, aggressive sanding, thick polyurethane smeared over delicate, aged finishes—these things erase detail and patina that can never be replaced.
That’s why so many of them recommend starting with the simplest possible approach, like the microfiber-and-solution method, before considering more invasive steps. Often, what a homeowner mistakes for destroyed finish is just years of misuse, bad polishes, and dust compacted into a sticky film. Remove that gently, and suddenly the original varnish or shellac is revealed, still serviceable, still beautiful.
Like a forest recovering after a gentle rain, the transformation is subtle but undeniable. Cracks seem softer. Colors feel truer. The wood stops looking like an object and starts looking like a living line through time—a relationship between tree, craftsman, and everyone who has run a hand along its surface since.
Knowing When to Stop
Perhaps the most important lesson, and the one beginners find hardest, is this: know when to stop. The goal isn’t to chase every flaw into oblivion. Those tiny dents on the edge of a table where generations of plates and books landed? They’re part of its biography. The faint shadow of an old water ring that refuses to disappear entirely? That’s a chapter, not a defect.
Experts say that the best restorations are the ones you don’t immediately notice. A guest walks into your dining room and remarks on how warm and inviting it feels, not how shiny the table is. You brush your fingertips along the arm of a chair and feel smoothness without stickiness, richness without plastic glaze.
With a simple solution and a cloth, you’ve not only cleaned—it’s as if you’ve apologized to the piece for years of neglect, then promised to do better.
Making It a Seasonal Ritual
Once you’ve seen what this humble mixture can do, you might be tempted to repeat it every weekend. Restoration experts would gently shake their heads. Wood likes kindness, not smothering. In most homes, giving your key wooden pieces this treatment two to four times a year is plenty.
Think of it like tending a garden. You don’t flood the soil every day; you water deeply and mindfully when the plants need it. Between these more nourishing sessions, you can maintain your furniture with dry dusting, a slightly damp microfiber cloth for spills, and a habit of respecting coasters and placemats.
What grows over time isn’t just a better-looking home, but a shifted perspective. A scratched thrift-store nightstand stops being “cheap” and starts being “promising.” An inherited cabinet that once seemed too far gone becomes a quiet project you look forward to. Each time you mix that simple solution and unfold the cloth, you’re also tending your own sense of continuity—of being part of a chain of people who choose care over replacement.
The Subtle Joy of Living with Restored Wood
There’s a small, private satisfaction in walking through your home weeks after a restoration session and still catching the way light lingers on a table edge, or how a once-cloudy dresser top now reflects the soft silhouette of a houseplant. No one else may know the exact afternoon you spent hunched over with a bowl of oil and vinegar at your elbow, but you do.
You remember the exact moment when the wood, for lack of a better phrase, woke up.
And the best part is that this isn’t an elite, secret craft. You don’t need a studio full of mysterious tools or decades of training. You need a microfiber cloth, a handful of pantry ingredients, and the willingness to move slowly, to see clearly, and to listen to what old wood is quietly asking for.
Frequently Asked Questions
Can I use this homemade solution on any type of wood furniture?
It’s generally safe for most sealed and finished wooden furniture, especially older varnish or shellac finishes. Always test first on a hidden area. Avoid using it on unfinished wood, raw wood, or specialty finishes without professional advice.
Will this solution remove deep scratches or water rings?
It softens the appearance of light surface scratches and may reduce the visibility of some water marks, but it won’t erase deep gouges or severe stains. For serious damage, this method is a gentle first step, not a full repair. You may still need professional refinishing for structural or heavy cosmetic issues.
How often should I treat my furniture with this mixture?
For most pieces in normal household use, two to four times a year is enough. Over-application can leave the surface oily or attract dust. In between, rely on dry or lightly damp microfiber dusting rather than constant re-oiling.
Is olive oil better than mineral oil for this?
Both can work. Olive oil is easy to find and gives a warm glow, but over long periods it can sometimes become tacky on certain finishes if heavily applied. Light mineral oil is more stable and less likely to go rancid. Many restoration experts lean toward light mineral oil for that reason.
Can I use this method on antique pieces with high monetary value?
If a piece is a true high-value antique, consult a professional conservator before applying any treatment. While this solution is gentle, valuable antiques sometimes require specialized, reversible methods. For typical household vintage or inherited furniture, this approach is usually considered both safe and beneficial when done carefully.
Why is microfiber cloth recommended instead of cotton rags?
Microfiber’s ultra-fine fibers trap dust, grime, and residues more effectively than most cotton rags, which often push particles around or leave lint behind. Microfiber also glides smoothly and reduces the risk of micro-scratches on the finish.
What should I do if the surface feels sticky after treatment?
Stickiness usually means too much oil was left on the surface. Wipe thoroughly with a clean, dry microfiber cloth to remove excess. If needed, lightly dampen a cloth with a bit of white vinegar alone, wipe again, then buff dry. Next time, use less solution and focus more on wiping off the surplus.