The first time you notice it, you almost doubt your eyes. A faint shadow in the rubber folds of the fridge door, a thin bruise of gray against white. You lean in. That unmistakable, earthy, slightly sour smell rises to meet you. Mold. Again. You scrub it off with a paper towel and a splash of something strong that smells like lemons and chemical warfare, slam the door shut, and promise yourself you’ll clean it properly “this weekend.” Two weeks later, you’re back in front of the same door, nose wrinkled, fingers pulling back the rubber seal, staring at the stubborn little galaxy of specks that has crept back as if you’d never tried at all.
The Hidden World Living in Your Fridge Door
Here’s the thing almost nobody tells you: your fridge seals are basically a tiny, squishy rainforest ecosystem waiting to happen. They’re dark. They’re often damp from condensation. They trap crumbs and sticky drips from jam jars and juice cartons. They warm up slightly every time you open the door. To a mold spore, that soft fold of rubber is not a seal; it’s a homestead.
We tend to think of the fridge as the cleanest place in the kitchen: cold, bright, humming with reassuring efficiency. But the seals around the door are different. They’re made of flexible rubber or silicone, with grooves designed to press tightly against the fridge body and keep the cold air from spilling out. Those grooves are exactly where gunk and moisture accumulate—often invisible unless you gently tug the seal aside and look directly into its creases.
If you’ve ever wiped the surface and thought, “There, done,” it’s a bit like washing your hands but ignoring the dirt under your fingernails. Mold doesn’t care about your effort; it cares about where the moisture and food particles are hiding. And fridge seals are very good at hiding things.
The trick isn’t just to remove what’s there. The real magic is learning to clean in a way that changes the environment so thoroughly that mold gives up trying to come back. That’s less about brute force and more about patience, gentle tools, and a little bit of curiosity about what’s happening in those soft rubber folds.
What Mold Really Wants (And Why It Loves Your Seals)
Imagine being a mold spore for a moment—microscopic, drifting on air, settling on whatever surface happens to be slightly damp and rich in organic matter. The inside of your fridge might be too cold and dry for you to really thrive, but that narrow strip of rubber along the door is a jackpot.
Mold needs three things to move in and never leave:
- Moisture – Condensation from warm air hitting cold surfaces, or tiny spills that never fully dry.
- Food – Invisible to us: sugars from juice, fats from dairy, a smear of tomato sauce, a trace of fruit pulp, even skin oils from your hands.
- Time – Mold is patient. It doesn’t need hours; it can quietly build colonies over days and weeks.
The seals are cushioned and flexible, so when you close the door, they press firmly into the frame, trapping a thin line of air—and whatever moisture was there. Each time you open the door, a soft breath of warmer, more humid air slips in. Some of that condensation lingers right in those folds. Add in crumbs or drips from packaging, and your seals become a slow, steady buffet.
If you’ve scrubbed the seals before and mold still came back, it’s not because you failed. It’s because most quick cleaning jobs only tackle the visible surface. Mold can root itself deeper in the tiny pores of the rubber or linger in crevices you can’t see. Unless you clean in a way that reaches into those folds, removes residue, and helps the rubber dry properly afterward, you’re just wiping the symptoms, not the cause.
The Slow, Satisfying Ritual of a Proper Seal Clean
There’s something strangely calming about deciding, “Today, I’m going to clean this one overlooked thing, and I’m going to do it well.” Cleaning fridge seals properly isn’t glamorous, but it’s deeply satisfying—especially once you understand what you’re doing and why it works.
Instead of rushing through with a harsh cleaner, you set yourself up for a small home ritual. You’ll need a few simple things—most of which you probably already have:
- A bowl of warm water
- A mild dish soap
- White vinegar (for disinfecting and discouraging mold)
- A soft cloth or two (microfiber is ideal)
- Cotton swabs or a soft toothbrush for the grooves
- A dry towel
- (Optional) A small amount of baking soda or hydrogen peroxide for stubborn spots
Before you start, open the fridge door and feel the rubber seal under your fingertips. Notice where it’s smooth, where it’s gritty, where the grooves are tight or deeper. You’re not just cleaning; you’re getting to know the landscape. Each fridge has its own tiny geography.
Then, it becomes a quiet process:
- Unplug if needed (or at least work quickly). If your fridge is older or you tend to leave doors open for a while, you might unplug it first for safety and energy saving. Otherwise, just be mindful not to linger for too long with the door open.
- Mix a gentle cleaning solution. Warm water with a few drops of dish soap is enough for the initial pass. For disinfecting later, you’ll use vinegar.
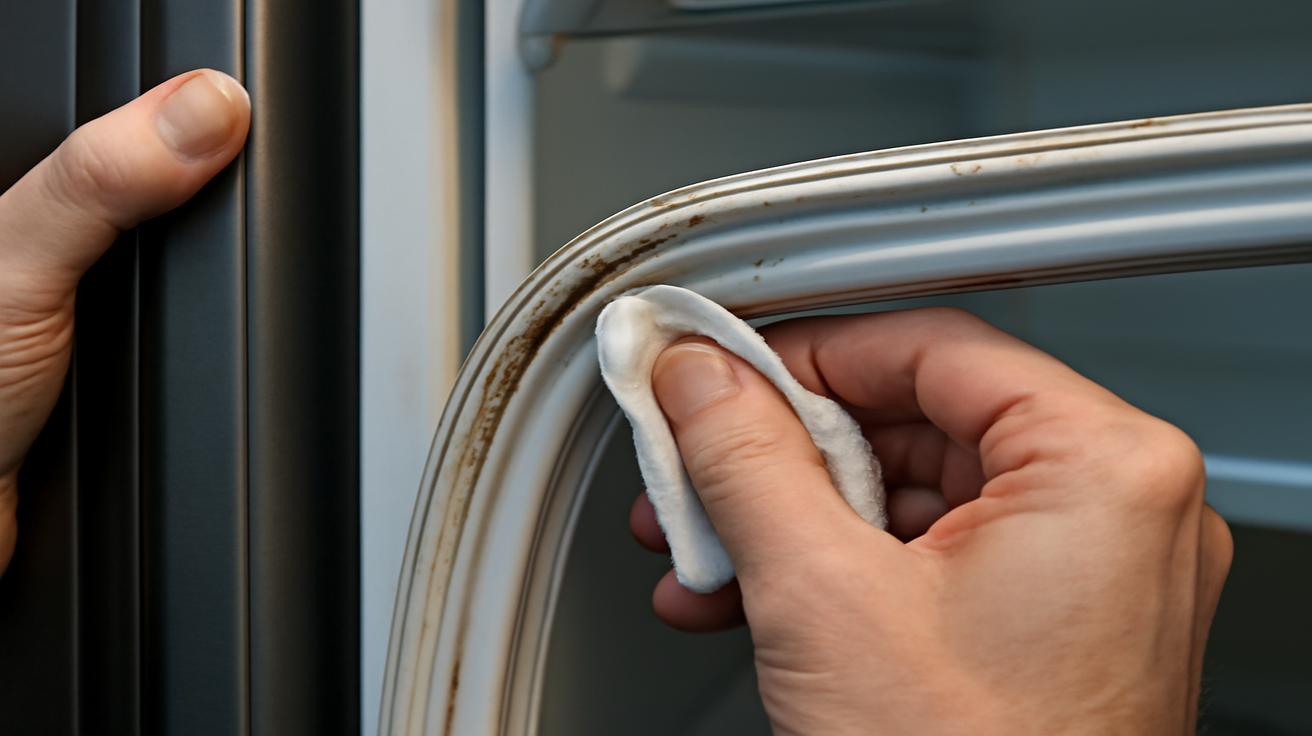
- Start with a surface wipe. Run your damp cloth along the entire length of the seal, top to bottom, inside and outside. You’re removing the obvious grime first.
- Work into the folds. This is where the cotton swabs or toothbrush come in. Gently pull the seal toward you to open its grooves, then dip your tool in the soapy water and trace along those lines. You might be startled by what comes out: grayish film, black specks, sticky residue.
- Rinse and repeat. Wipe again with a clean, damp cloth to remove soap and loosened debris.
Up close, you may see faint shadows of mold that aren’t fully gone yet. This is when you shift from general cleaning to more targeted, mold-discouraging steps.
The Quiet Power of Vinegar, Peroxide, and Patience
Mold isn’t impressed by strong artificial scents or flashy labels. It reacts to chemistry and environment: acidity, oxygen, dryness. That’s why some of the gentlest-looking items in your pantry can do a better job on your seals than the harshest multipurpose spray.
White vinegar is one of your best allies here. It’s acidic enough to make life uncomfortable for mold, but it’s relatively gentle on rubber—not something you want to dry out or crack with overly strong chemicals. You don’t need to drown your fridge in it; a small amount, applied with intention, goes a long way.
Here’s how to use it thoughtfully:
- Mix equal parts white vinegar and warm water in a bowl.
- Dip a clean cloth or cotton swab into the mixture.
- Press it gently into the grooves of the seal, especially where mold tends to return.
- Let it sit for a few minutes, giving the vinegar time to work.
If you’re dealing with stubborn, deeply rooted spots that seem to laugh at your efforts, you can bring in hydrogen peroxide (3%). Dab it carefully on the worst areas, let it sit for about 5–10 minutes, then wipe it away thoroughly. Peroxide breaks down into water and oxygen, which is gentle enough for most seals but effective on mold. Always test a tiny, hidden area first to be sure your specific rubber doesn’t discolor.
Another quiet helper is baking soda. Not as a main cleaner—its grittiness can be too abrasive if overused—but as a mild paste for particularly stained spots. Mix a small amount of baking soda with water to create a soft paste, apply it gently with your cloth or toothbrush, rub lightly, and rinse well.
Once the seal looks clean to your eyes, this is where many people stop. But there’s one step left that matters more than almost anything else.
You must dry the seals completely. Any moisture left lurking in those grooves is an open invitation for mold to creep back. Take a dry towel or cloth and trace every line, every fold, every corner. Feel for dampness. Press softly into the grooves. This drying step is where you transform your cleaning from a temporary fix into a lasting change.
Keeping Mold From Coming Back: The Small Habits That Matter
You don’t have to wage war on your fridge every weekend to keep mold away. What you need is a small, almost invisible rhythm of attention—tiny things you do regularly that keep the seals inhospitable to mold without much effort.
Think of it as tending a boundary. The seal is literally the border between your fridge’s cold interior and the warm air of your kitchen. When that border is well cared for, everything inside functions better: food lasts longer, energy use stays efficient, and you’re not greeted with sour smells every time you grab the milk.
Here are a few subtle habits that help more than they seem:
- Wipe the seals during your normal fridge check. When you already have the door open to toss expired items or rearrange food, run a slightly damp cloth along the seals. It takes seconds and clears away crumbs and drips before they have time to feed mold.
- Dry after big spills. If a container leaks or a bottle tips, don’t just clean the shelf—trace the path of the spill all the way to the seal. Liquids almost always find their way there.
- Watch the door gap. If the seal isn’t sitting flat against the frame—if you see gaps, warping, or damage—cold air escapes, condensation forms, and mold gets more chances. In that case, cleaning helps, but you’ll also want to think about repairing or replacing the seal.
- Avoid slamming the door. Hard impacts wear out seals faster, creating tiny cracks where moisture collects.
- Control overall humidity. In very humid homes, mold has an advantage everywhere. Using a dehumidifier in the kitchen or improving ventilation can make a noticeable difference.
Many people find that once they’ve done a single, thorough deep clean of the fridge seals, the follow-up becomes easy. A quick swipe once a week, a more mindful check once a month, and maybe a deeper clean every few months is usually enough to keep mold at bay—if you’re really drying things properly each time.
A Simple Fridge Seal Care Schedule
| Frequency | Action | Why It Helps |
|---|---|---|
| Weekly | Quick wipe of seals with a damp cloth, then dry | Removes fresh crumbs and spills before mold can feed on them |
| Monthly | Check grooves with a cotton swab; spot clean with mild soap solution | Clears hidden grime in folds where mold starts |
| Every 3–4 months | Thorough clean with soap, then vinegar or peroxide for problem areas; dry completely | Resets the environment and discourages recurring mold colonies |
| As needed | Inspect for damaged or warped seals; repair or replace if needed | Keeps cold air in and condensation down, limiting mold growth |
When It’s Not Just About Cleanliness: Knowing When to Let a Seal Go
Sometimes, no matter how kindly and thoroughly you clean, the mold returns in the exact same pattern, like a haunting watermark. You might scrub, rinse, dry, disinfect, and still find that same gray arc a few weeks later. When that happens, the problem might not be your technique—it might be the seal itself.
Rubber and silicone age. They stiffen. They crack. Microscopic fissures open up, places where moisture seeps in and never quite dries, where mold can nest beyond the reach of your cloth and cotton swabs. If your seal feels brittle, has visible tears, or doesn’t snap neatly against the fridge frame anymore, it’s not just a cleaning issue; it’s a structural one.
You can test the general health of your seal with a simple trick: close the fridge door on a sheet of paper or a thin bill. Try to pull it out. If it slides easily with no resistance in several spots around the door, the seal might not be doing its job well. Poor sealing means more warm air, more condensation, and more opportunities for mold to party in the folds.
In these cases, replacing the seal might be the most effective “cleaning” you can do. Most modern fridges have seals that can be ordered as a specific part number and installed with a bit of patience. It’s not always a quick project, but it’s often much cheaper than replacing the entire fridge—and it dramatically cuts down on recurring mold if the old seal was damaged beyond what cleaning can fix.
Even if you’re not ready to replace the seal immediately, understanding its condition helps you set realistic expectations. A worn seal can be kept usable and relatively clean with frequent, gentle care, but it will always be more vulnerable to mold than a new, supple one.
Reframing Fridge Cleaning as Care, Not Chore
There’s a subtle shift that happens when you no longer think of chores like this as punishment or drudgery. You begin to see them as a way of tending to the space that takes care of you, holding your food in its quiet, humming cold, preserving the bright greens and deep reds and soft cheeses and jars of leftover soup that feed your days.
Cleaning the seals isn’t about waging war on mold with ever-stronger sprays. It’s about learning how that boundary works—the rubber, the folds, the moisture, the tiny worlds that form in neglected grooves—and then gently but firmly saying: not here. Not anymore.
When you pull open the fridge door a week after a proper cleaning and smell nothing but faint cold air, see nothing but smooth, pale rubber, you feel it in a small, visceral way: a little order restored. One less place for unwanted things to quietly grow.
Frequently Asked Questions
How often should I deep clean my fridge seals to prevent mold?
For most households, a thorough deep clean every 3–4 months is enough, as long as you’re doing quick weekly wipes and drying the seals. If you live in a very humid climate or open the fridge frequently, you may want to deep clean every 2–3 months.
Is bleach safe to use on fridge door seals?
Occasional, very diluted bleach can kill mold, but it can also dry out or damage some rubber seals over time. If you choose to use it, dilute it heavily, wear gloves, ventilate the area, test a small hidden spot first, and rinse and dry thoroughly. Vinegar or hydrogen peroxide are usually safer long-term options.
Why does mold keep coming back even after I scrub it off?
Most likely, mold is returning because some combination of moisture, hidden food residue, and microscopic mold roots remain in the rubber folds. If you don’t clean deep into the grooves, disinfect gently, and dry completely, mold can regrow from what’s left behind. A worn or damaged seal can also make recurring mold more likely.
Can I remove the seals from the door to clean them?
Some seals are designed to be removable; others are not. For many fridges, the seal is pressed or clipped into a groove and can be carefully pulled out and reinstalled. However, unnecessary removal can stretch or damage the seal. Unless the manufacturer specifically recommends removing it for cleaning, it’s usually better to clean it in place, working carefully into all folds.
What’s the safest method if I have kids or pets?
Mild dish soap and warm water, followed by white vinegar and thorough drying, is generally very safe. Avoid leaving strong chemical cleaners or bleach-based solutions on the seal surface. Whatever you use, rinse or wipe with clean water afterward and dry well so there’s no residue to transfer to food or little fingers.
How can I tell if my fridge seal needs to be replaced?
Signs your seal may need replacing include: visible cracks or tears, mold stains that won’t lift even after deep cleaning, the door not closing tightly, or the paper-slip test failing in multiple spots. If your fridge runs constantly or you notice more condensation inside, a worn seal is often the culprit.
Will cleaning the seals really help my fridge work better?
Yes. Clean, flexible, well-seated seals keep cold air in and warm air out. That means less condensation, fewer mold-friendly damp spots, more stable temperatures, and often lower energy use. It’s a small act of maintenance that supports the whole system—from how your food lasts to how hard your fridge has to work.