The first time I opened the oven that started all of this, a warm wave of shame rolled over me before the heat did. Blackened cheese clung to the racks like ancient fossils. A galaxy of grease splatters shimmered on the glass door. Something at the bottom—once a lasagna, maybe?—had transformed into a charred, mysterious continent. It smelled faintly of burnt toast and old ambitions.
If you’ve ever pulled open your oven and met it with that same mix of horror and resignation, you’re in good company. We promise ourselves we’ll clean it “next weekend,” and then we forget—until the next pizza night, when smoke curls out of the vent and the smoke alarm starts complaining.
Conventional wisdom tells us to reach for three things: lemon, baking soda, or a harsh chemical cleaner that smells like it could strip paint off a car. But the day I rediscovered my oven, I was out of lemons, down to my last dusty teaspoon of baking soda, and absolutely not in the mood for noxious foam and safety gloves.
That’s when I tried two ingredients that, at first, felt almost like a prank—too simple, too ordinary, too gentle to work. But they did. Oh, they did. And they left my oven so clean it looked like I’d replaced it.
The Mess You Pretend Not to See
Oven grime doesn’t arrive all at once; it sneaks up on you. One enthusiastic roast chicken, a bubbling fruit cobbler, a pan of nachos that overflowed by just a tablespoon—that’s all it takes. Each spill bakes on a little deeper, caramelizing into a stubborn, sticky varnish that laughs in the face of a damp sponge.
If you listen closely, though, a dirty oven tells you stories. That dark ring around the heating element? Maybe the time your cousin came over and you attempted your first sourdough loaf. The sugary, amber crust welded to the corners? Those are holiday pies, celebrations, birthdays, late-night baking experiments. The mess is a record of your life.
There’s a tenderness in that realization. Still, you can only tolerate so much “sentimental” carbon before it starts interfering with your cooking, your air quality, and your mood. Food bakes unevenly, smoke flavors your meals, and every time you preheat, you brace for that burnt-toast smell.
So how do you erase all that history without dissolving your lungs along with the grease—or scrubbing like you’re polishing the deck of an old ship?
Not Lemon, Not Baking Soda: Meet Ingredient #1
The first game-changer sits, more often than not, somewhere near the sink, waiting quietly for dishes. It doesn’t promise magic. The label might talk about “cutting grease,” but no one ever celebrates it as a miracle oven cleaner. Still, when used the right way, plain liquid dish soap becomes unexpectedly powerful.
Not the fancy kind scented like a tropical vacation, not the “extra foamy,” glittery, limited-edition version. Just straightforward, grease-cutting, liquid dish soap.
Why does something gentle enough for your hands work so well on an oven that looks like it belongs in a roadside diner? It’s simple chemistry blended with a little bit of strategy. Dish soap is designed to break down fats and oils, which is exactly what that shiny, sticky, brown residue is made of. The trick is to give it time and the right environment to work instead of just swiping at cold, hardened grease and wondering why nothing happens.
Imagine your oven, just barely warm—like a sunlit stone at the end of the day. The glass door foggy with old splatters, the racks streaked with dulled silver beneath a veil of burnt orange. You drizzle dish soap into a shallow bowl and feel, perhaps for the first time, a flicker of optimism.
How to Use Dish Soap So It Actually Works
Here’s the quiet ritual that transforms dish soap from “nice try” to “did I just buy a new oven?”
- Warm the oven slightly. Turn it on to a low setting—about 100–120°C (or 200–250°F)—for 3–5 minutes, then turn it off and crack the door. You want it warm, not hot. Think “cozy bath,” not “volcano.”
- Make a soapy solution. In a bowl, mix a good squeeze of dish soap with warm water. You’re aiming for silky, not bubbly—too many suds just get in the way.
- Remove the racks. Pull them out and set them in or over your sink, bathtub, or a large bin if you have one. They’ll get their moment soon.
- Generously wipe the inside. Dip a soft cloth or non-scratch sponge into the soapy water and coat the interior of the oven—walls, floor, and door (inside and out). Don’t scrub yet; just lay down a glossy film of soap and let it cling.
- Let it sit. This is the part most people skip. Close the door and walk away for 20–30 minutes. The warmth helps the soap loosen the grease, slowly softening it like butter left on the counter.
- Wipe, don’t fight. When you come back, swipe a clean, damp cloth across a patch of once-burnt-on residue. You’ll feel it—whole layers sliding away with a fraction of the effort you’re used to. Streaks of metal peek through, shocking in their shine.
For most everyday grime, that’s almost enough on its own. But for the dark, prehistoric patches of baked-on gunk—the kind that’s survived holidays, move-in dates, and at least one “I’ll deal with it later”—you’ll need a second ally.
The Pantry Staple with a Secret Superpower
The second ingredient is almost embarrassingly mundane: white vinegar. Yes, that bottle you use for salad dressing and the occasional pickle project. No fizzing volcano here, no chemical drama—just a clear, sharp liquid that smells like determination.
We tend to think of vinegar as something we add to food, not something we wage war with. Yet it’s quietly acidic, which makes it a natural enemy of mineral deposits, streaks, and the stubborn film that lingers even after the grease has surrendered. Where dish soap breaks apart the fatty, shiny layer, vinegar steps in to dissolve residue, cut through cloudy build-up, and leave surfaces gleaming.
The real magic happens when you use the two together—but not in the chaotic foam party way people do with baking soda. This partnership is calmer, more deliberate. Soap first, then vinegar, like two movements in a piece of music.
The Two-Ingredient, Almost-No-Scrub Oven Ritual
Here’s the full, gentle sequence—no special tools, no harsh fumes, no full-afternoon marathon of scrubbing until your arms ache.
- Soften with dish soap. Follow the warm-oven, soapy-coating steps above. Let the soap sit and work, softening grease and loosening burnt bits.
- Lift off the worst. Use a damp cloth or sponge to wipe away as much as you can. For thicker patches, a flexible plastic scraper or an old bank card can nudge the softened layers without scratching the surface.
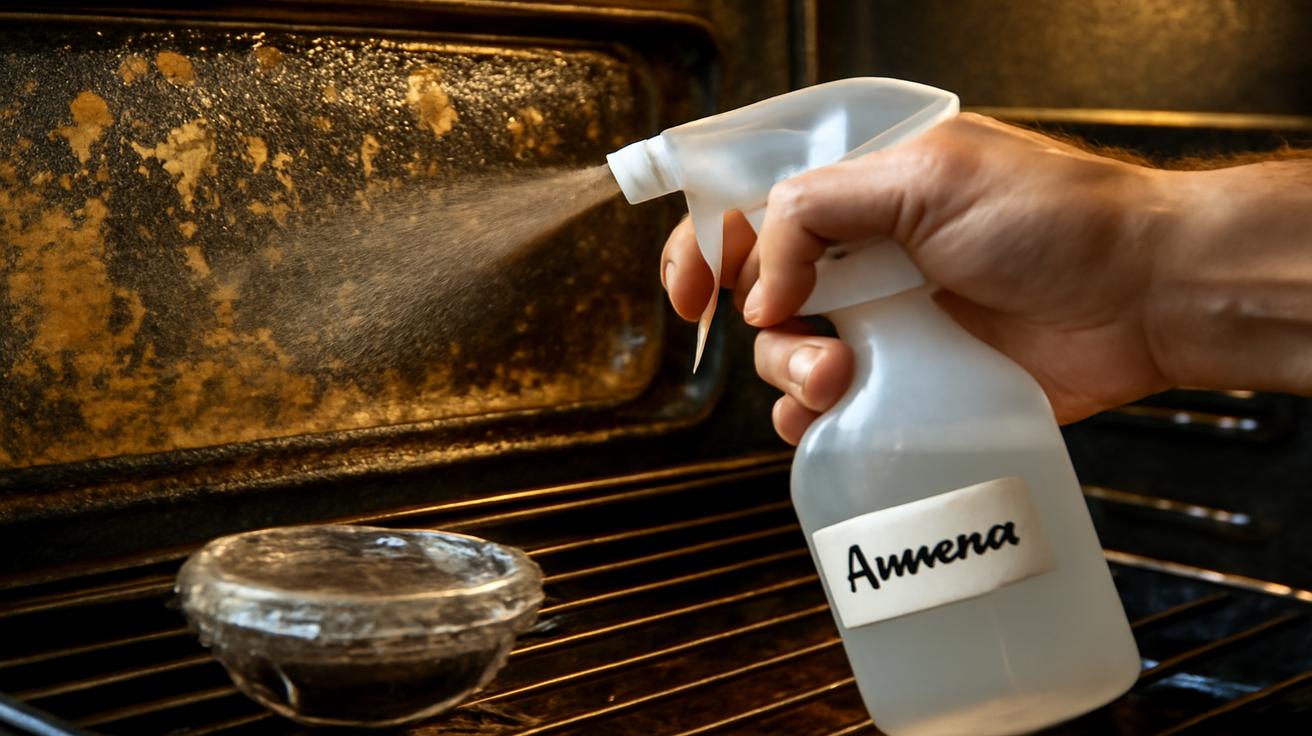
- Steam with vinegar. Fill an oven-safe bowl or dish with about one cup of white vinegar. Place it on the middle rack, close the door, and turn the oven back on to low heat (again, about 100–120°C / 200–250°F) for 10–15 minutes. Then turn it off and let the bowl sit inside as the oven cools.
- Open to a softened world. When you open the door, a gentle vinegar scent rises, sharper than lemon but somehow cleaner, more honest. Steam kisses the glass. Those last stubborn spots look tired, as if they’ve decided it’s time to let go.
- Final wipe. Remove the bowl, dampen a clean cloth with a bit of the now-warm vinegar, and wipe the interior once more. This is the moment the streaks vanish and the dullness lifts. What’s left is clean metal, clear glass, and a surprising sense of relief.
There is a softness to this process. You’re not attacking your oven; you’re coaxing it back to itself.
Don’t Forget the Racks and the Glass
The racks, poor things, often take the worst of it. They carry your cakes and chickens, your casseroles and crumbles, and they rarely get any gratitude.
A Gentle Bath for the Racks
Slide your racks into a tub or large basin if you have one (a deep sink also works). Plug the drain, then:
- Fill with very warm water until the racks are submerged or mostly covered.
- Add a generous squirt of dish soap—enough to lightly perfume the water and make it feel slightly slippery.
- Walk away for at least 30–40 minutes.
By the time you return, much of the grease will have softened or lifted. A non-scratch sponge or brush will whisk away the rest with minimal pressure. Rinse well, and the metal shines like jewelry.
The Glass Door: Where Vinegar Shines
The inner glass door is where you witness your oven’s transformation most dramatically. That cloudy film and those sticky streaks can make even a clean oven look neglected.
Once you’ve wiped it with dish soap and let it sit, follow with a vinegar cloth. Wipe in long, even strokes. Then, for a streak-free finish, go back with a dry microfiber cloth. You’ll see not just the change in shine but in clarity, as if you’ve cleaned a window to a small, fiery world.
For anyone who likes to keep things simple, here’s a quick side-by-side look at what these two everyday ingredients actually do.
| Ingredient | Primary Role | Best Use In Oven | Bonus Perks |
|---|---|---|---|
| Liquid dish soap | Breaks down grease and oily residue | Coating interior surfaces and soaking racks | Gentle on hands, low odor, safe on most finishes |
| White vinegar | Dissolves film, cuts residue, boosts shine | Steam bath, final wipe, glass and door cleaning | Deodorizes, reduces streaks, inexpensive |
Why This Feels So Different
There’s a noticeable difference between battling your oven and working with it. Chemical cleaners feel adversarial: mask on, windows open, label warnings humming in the back of your mind. Lemon and baking soda can be lovely, but they often morph into a gritty paste that still needs plenty of elbow grease.
This two-ingredient ritual, by contrast, feels like a conversation. The dish soap negotiates with the grease; the vinegar quietly finishes the job. You’re not forcing anything. You’re allowing time, warmth, and simple chemistry to do the heavy lifting.
You notice it, too, in the way your kitchen feels afterward. No harsh scent that lingers for hours, just a faint whisper of vinegar that dissipates quickly, leaving the space smelling neutral and honest. When you open the oven the next day to slide in a tray of vegetables or a loaf of bread, there’s no ghost of last month’s burnt drips. Just heat, clean and bright.
Maybe that’s the most surprising part: how emotionally satisfying it is. You close the oven door and feel, in a small but real way, like you’re taking care of the heart of your kitchen. Not with heroic effort, but with patience and two ingredients that have probably been there all along.
Keeping It Clean Without Really Trying
A freshly cleaned oven can feel like a fragile thing, as if one bubbling pan of lasagna will undo all your work. But once you’ve done this deeper reset, staying on top of it takes only a few minutes here and there.
Small Habits, Big Difference
- After messy meals, wipe while it’s warm. When the oven is off but still slightly warm, a quick swipe with a dish soap cloth lifts fresh splatters before they have time to harden into history.
- Do a vinegar steam once a month. Even if it doesn’t look dirty, that simple bowl of vinegar and low heat keeps film from building up and helps neutralize lingering smells.
- Catch spills in the act. If something overflows, let the oven cool just enough that it’s safe to reach in, then lay a damp, soapy cloth or paper towel over the spill. It’ll soak and soften as the oven continues to cool, making it much easier to remove later.
- Be kind to the glass. Skip abrasive pads. The dish soap + vinegar + microfiber trio is usually all you need to keep it clear.
The more you treat cleaning as a gentle, ongoing conversation instead of a once-a-year battle, the less time you spend on your knees, scrubbing at regrets.
The Quiet Pleasure of a Clean Oven
When my own oven finally shed its armor of baked-on memories, the transformation felt almost private. There was no audience, no before-and-after post. Just me, standing there with a slightly damp cloth and a ridiculous swell of satisfaction.
On the next rainy evening, I slid in a tray of root vegetables—carrots, parsnips, red onions glossed with oil and herbs. As they roasted, the oven window stayed clear, a little theater of caramelization. No smoke alarm, no faint whiff of old spills. Just the soft tick of metal expanding in the heat, the sweet, earthy aroma of roasting vegetables, and the quiet knowledge that this small corner of my world was, for once, simply clean.
Not lemon. Not baking soda. Just dish soap and vinegar, working together like they’ve been waiting for the invitation all along.
Frequently Asked Questions
Can I use this method in a self-cleaning oven?
Yes. This dish soap and vinegar method is gentle and suitable for most self-cleaning ovens. Just avoid scrubbing the special interior coating with anything abrasive, and never use this method at the extremely high temperatures of a self-cleaning cycle. Use it when the oven is off and only slightly warm.
Will vinegar damage the inside of my oven?
Used in moderation and wiped off afterward, white vinegar is generally safe for standard oven interiors and glass doors. Avoid soaking any exposed electrical components or using it on uncoated aluminum parts for long periods. Always finish with a clean, damp cloth to remove residue.
Do I have to heat the oven for this to work?
Technically, no—but gentle warmth makes a big difference. A slightly warm oven helps soften grease and allows dish soap and vinegar to work more effectively, cutting down on scrubbing time. Just ensure it’s warm, not hot, so you can work comfortably and safely.
What type of dish soap works best?
A basic, grease-cutting liquid dish soap (the kind you’d use by hand, not in a dishwasher) works best. You don’t need anything extra fancy. Avoid heavily scented or colored soaps if you’re sensitive to fragrance or want to keep residue minimal.
How often should I deep-clean my oven this way?
For most home kitchens, every 2–3 months works well, depending on how often and how messily you cook. If you do a lot of roasting or cheesy bakes, you might prefer every 4–6 weeks, with quick wipes after particularly messy meals to keep things under control.
Is this safe for people with sensitivities to strong cleaners?
Many people with sensitivities prefer this method because dish soap and white vinegar are milder and far less fume-heavy than commercial oven cleaners. However, if you’re sensitive to fragrances or vinegar’s sharp scent, choose an unscented dish soap and keep a window cracked while steaming with vinegar.